The title for this post is “How Difficult Is It To Start Your Single-cell Analysis As A Beginner”. However, once I finished writing the post, the majority of the content is actually about “Seurat and OSCA Installation On Freshly Installed Ubuntu/Debian/Fedora”. Oh well … If you do not have time, just go to the final Summary section to see the final results.
Introduction
When I started my NGS analysis during my PhD, which was more than 10 years ago, one of the most difficult things was software installation. In many cases, you needed to do the following three magic steps:
./configure
make
make install
If things went well, it meant we managed to install the intended software successfully. Congratulations! However, errors occurred … should I say … very often? It was definitely more often than I expected. For example, I’m sure you’ve got the “Permission denied” error at least once. Most of the time, it happens at the make install stage where the system tries to copy the compiled binaries to a default place, usually /usr/local/bin where we do not have the write permission as a normal user. Whenever this happens, we can manually copy the compiled binaries to a place that we have the write permission and add that directory to our $PATH. Alternatively, we could set the prefix during the ./configure stage to change the default installation place. Or you can just use a machine where you have the admin right and do sudo make install. Anyway, it is an easy-to-solve error, and we could solve it once we do some basic search or read the installation guide (if any) that comes with the software.
The tricky bit is when we encounter some errors during the ./configure or make stage, especially the make stage. Very often, very long logs are printed to the terminal, which looks really intimidating if we are not used to working with the terminal. In this case, it is highly likely that some dependencies are missing in our system. Of course, we could copy and paste the error messages to Google and find potential solutions. However, we may not be able to find a solution eventually. That was the first problem, and it could be avoided by using precompiled binaries that were not always available.
Once we got some experience, we often needed some Python/R/Perl packages to do some exploratory and in-depth analyses. That was when we encountered the second problem. How should we do that? In this case, we need to install Python or R or Perl packages. Many years ago, in order to install Python packages, we might need to download the source code and do:
$ python setup.py install
Not sure about R or Perl back in the days, but I suppose it was something similar. Again, errors could occur and it required some language-specific knowledge to understand the error messages and solve the problem.
Now, in 2024, with all the package managers (e.g. conda) and detailed bioinformatics tutorials, software installation is often achieved by a simple command like conda install <package_name>. Therefore, it seems getting your hands on the analysis of your sequencing data should be easy nowadays. Or is it? Let’s have a look.
Setting Up Your Computing Environment From Scratch
Imagine we are new students that have some basic experience on the command line usage and just get a new computer workstation as our tool. Since we work on single-cell analysis, we would want to setup an environment from scratch for that purpose. In this case, what should we do? Well, first we need to install an operating system, of course. Some initial internet search would tell us to use the Linux operating system. There are way too many Linux distributions that are not relevant for beginners. Many people recommend Ubuntu for beginners, so let’s just use that. Let’s also include Debian and Fedora as well which are also popular.
The next thing is to decide what flavour of analysis pipeline we would like to learn and use. If we were to analyse single-cell genomics data, we probably already started reading literatures. If we have already read a few papers, I’m sure we have come across Scanpy or Seurat. In addition, we may also see Orchestrating Single-Cell Analysis with Bioconductor (OSCA). All of them have very good documentations and are widely used in the community. It is a good start if we follow their tutorials. Let’s just try all of them, because why not?
Let me use the free credits given by Google Cloud Platform (GCP) to simulate this situation.
Install The Operating System
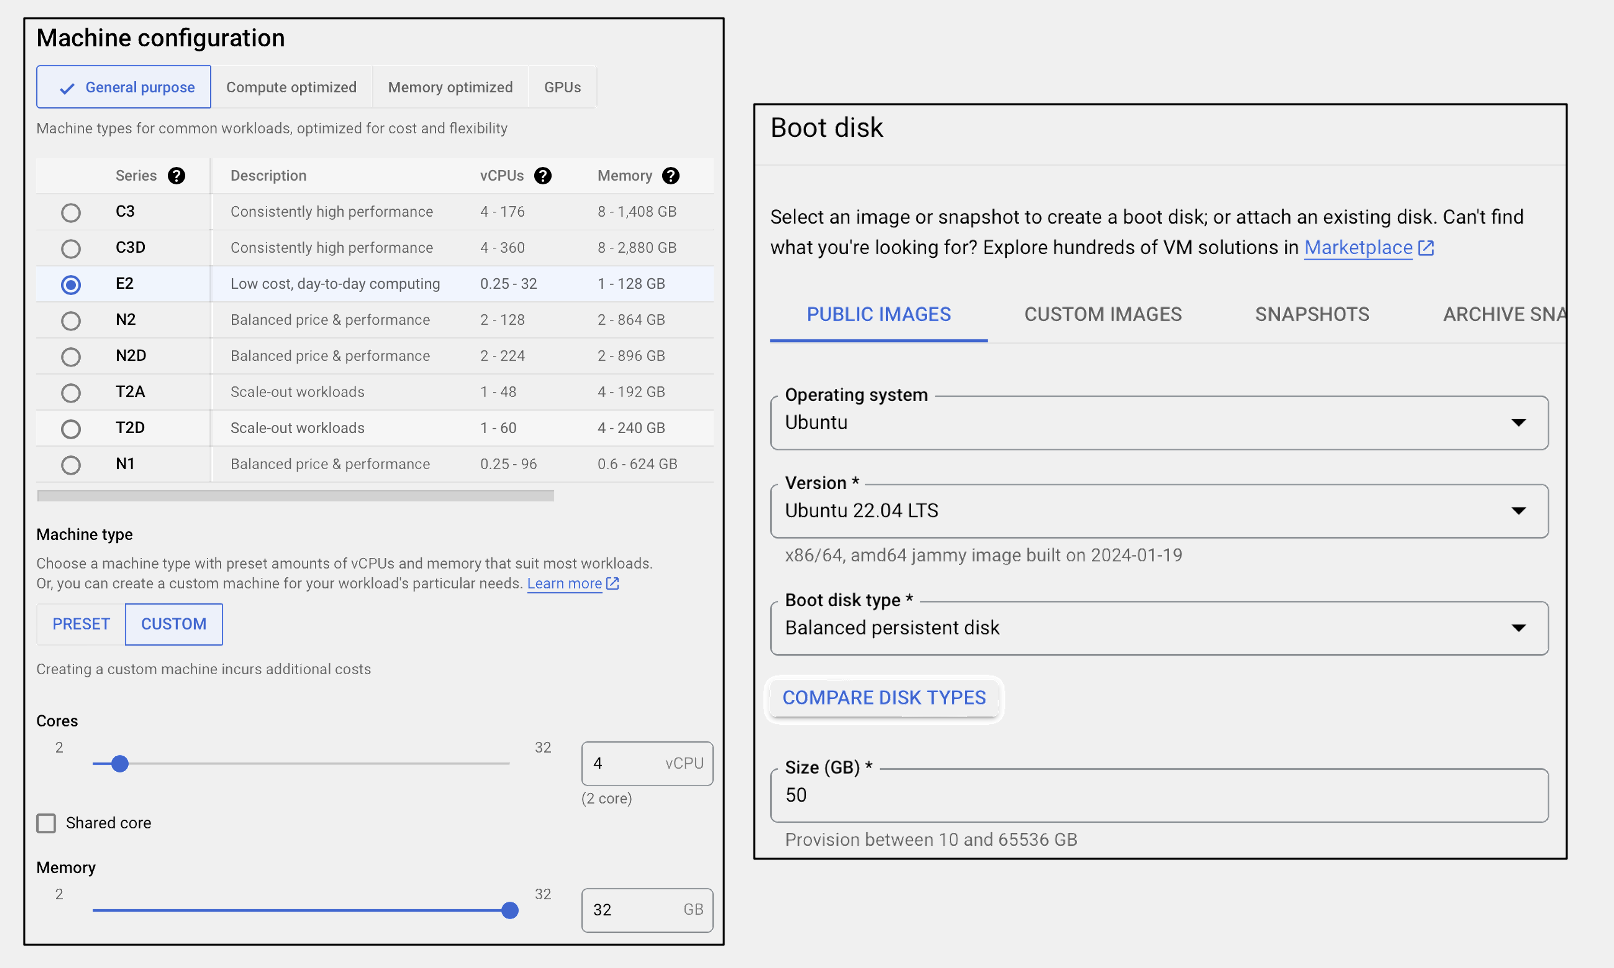
Here, I created a VM instance using the E2 series, with 4 CPU and 32 GB memory. For the operating system, there are multiple different versions of Ubuntu. Let’s just use the latest Long Term Support (LTS) version, which is 22.04 LTS at this time of writing. The basic setup is shown below:
Ubuntu + Scanpy
Once we started the VM instance, we could treat that as our workstation with freshly installed Ubuntu 22.04 LTS. Now let’s try Scanpy. We went to the installation page here and saw that they recommended installing Miniconda so that we could use the conda package manager to install the dependencies required by Scanpy.
So we headed to the Miniconda webpage, downloaded the Linux installer to our VM and ran the installer file:
$ wget https://repo.anaconda.com/miniconda/Miniconda3-latest-Linux-x86_64.sh
$ chmod +x Miniconda3-latest-Linux-x86_64.sh
$ ./Miniconda3-latest-Linux-x86_64.sh
We just followed the instructions on the screen and answered “yes” to the final question: “Do you wish to update your shell profile to automatically initialize conda?”
After the Miniconda installation, we exited and logged in again. Everything was ready to go.
Then we went back to the Scanpy installation page and followed the instructions to first install the dependencies by:
$ conda install -c conda-forge scanpy python-igraph leidenalg
Then we installed Scanpy by:
$ pip install scanpy
Everything went smoothly, and the whole process only took a few minutes. We were able to follow the tutorial to start our single-cell analysis using Scanpy.
Ubuntu + Seurat V5
Now let’s try Seurat using the same procedures, starting with a fresh VM. First, we headed to the installation page of Seurat. Then we were told that we needed R version 4.0 or greater. Let’s do that by simply following the instructions from the official R website. The installation page for Ubuntu told us the following, which I copied and pasted here:
# update indices
sudo apt update -qq

# install two helper packages we need
sudo apt install --no-install-recommends software-properties-common dirmngr

# add the signing key (by Michael Rutter) for these repos
# To verify key, run gpg --show-keys /etc/apt/trusted.gpg.d/cran_ubuntu_key.asc
# Fingerprint: E298A3A825C0D65DFD57CBB651716619E084DAB9
wget -qO- https://cloud.r-project.org/bin/linux/ubuntu/marutter_pubkey.asc | sudo tee -a /etc/apt/trusted.gpg.d/cran_ubuntu_key.asc

# add the R 4.0 repo from CRAN -- adjust 'focal' to 'groovy' or 'bionic' as needed
sudo add-apt-repository "deb https://cloud.r-project.org/bin/linux/ubuntu $(lsb_release -cs)-cran40/"

# install R and its dependencies
sudo apt install --no-install-recommends r-base
We ran the above commands one-by-one in that order, and they should run smoothly without any errors. Once this was done, we could start R. To avoid the “Permission denied” issue, we just ran it with sudo:
$ sudo R
Then we should see the following message:
R version 4.3.2 (2023-10-31) -- "Eye Holes"
Copyright (C) 2023 The R Foundation for Statistical Computing
Platform: x86_64-pc-linux-gnu (64-bit)

R is free software and comes with ABSOLUTELY NO WARRANTY.
You are welcome to redistribute it under certain conditions.
Type 'license()' or 'licence()' for distribution details.

R is a collaborative project with many contributors.
Type 'contributors()' for more information and
'citation()' on how to cite R or R packages in publications.

Type 'demo()' for some demos, 'help()' for on-line help, or
'help.start()' for an HTML browser interface to help.
Type 'q()' to quit R.

>
That meant we had successfully installed R version 4.3.2.
Inside R, we followed the instruction to install the latest Seurat which was V5. The instructions told us to pull it from CRAN. We just do the following:
> install.packages('Seurat')
Then an intimidating amount of compiling logs were printed on the screen. If we followed the text in action, we noticed a lot of lines starting with “ERROR”, but the text was flying so fast and it was difficult to catch them. Finally, we got many errors in the end, which I assumed (not sure) was a summary of all the errors printed previously. The error lines were too many, and they were all in the format of:
ERROR: dependencies ‘<package_name>’ are not available for package ‘<package_name>’
* removing ‘/usr/local/lib/R/site-library/<package_name>’
The last line of the error in my case was:
ERROR: dependencies ‘SeuratObject’, ‘cowplot’, ‘fastDummies’, ‘future’, ‘future.apply’, ‘ggplot2’, ‘ggrepel’, ‘ggridges’, ‘httr’, ‘igraph’, ‘irlba’, ‘jsonlite’, ‘leiden’, ‘lifecycle’, ‘lmtest’, ‘matrixStats’, ‘miniUI’, ‘patchwork’, ‘plotly’, ‘png’, ‘progressr’, ‘purrr’, ‘RANN’, ‘Rcpp’, ‘RcppAnnoy’, ‘RcppHNSW’, ‘reticulate’, ‘rlang’, ‘ROCR’, ‘RSpectra’, ‘Rtsne’, ‘scales’, ‘scattermore’, ‘sctransform’, ‘shiny’, ‘spatstat.explore’, ‘spatstat.geom’, ‘tibble’, ‘uwot’, ‘RcppEigen’ are not available for package ‘Seurat’
* removing ‘/usr/local/lib/R/site-library/Seurat’
This was really annoying, because we had just followed the exact steps but got so many errors. We did not know where to start. Therefore, I Googled “install seurat v5 ubuntu” and got the following thread in GitHub
https://github.com/satijalab/seurat/issues/1183
It seems there are a lot of dependencies missing in a freshly installed Ubuntu. You see, there is a difference. Seurat is dependent on some “stuff” in the operating system AND some packages in R. The latter should be handled automatically (I assume) by the install.packages command inside R. However, the former, that is the missing dependencies in the operating system Ubuntu, need to be handled by ourselves. Now let’s follow the instructions provided by @wyattmcdonnell, which is basically install the missing dependencies in the Ubuntu operating system. Since we already had R, we just need to install the dependencies, and note that installing some packages would automatically get others. Therefore, we just did the following:
$ sudo apt update
$ sudo apt upgrade
$ sudo apt install libcurl4-openssl-dev
$ sudo apt install libhdf5-dev
$ sudo apt install h5utils
Once we installed all the above dependencies, we tried to install Seurat again and then we got many errors again … Going back through the long logs, I noticed one particular error among the wall of text:
sh: 1: make: not found
That was the time when we realised that some very basic programs, like make, gcc and g++, to compile software were actually missing in the freshly installed Ubuntu. Let’s install all of them together by install the bundle build-essential:
$ sudo apt install build-essential
Okay, once again, we tried to install Seurat after that. And once again, we got errors after more than 30 minutes of compiling logs. Going back through the logs, I noticed another error:
sh: 1: gfortran: not found
Okay, fine. Let’s install the missing package:
$ sudo apt install gfortran
Once gfortran was installed, we tried to install Seurat again. Based on our previous experience, we paid attention to and looked closely at the logs ON THE FLY!!! Unsurprisingly, errors occurred again. This time, we managed to capture all of them since we were looking at them in real time. There were three of them:
/usr/bin/ld: cannot find -llapack: No such file or directory
/usr/bin/ld: cannot find -lblas: No such file or directory
/bin/bash: line 1: libpng-config: command not found
Then we looked for help via Google. This post told us that we needed to do the following to get lapack and blas:
$ sudo apt install libblas-dev
$ sudo apt install liblapack-dev
and this post told us that we needed to do the following to get libpng-config:
$ sudo apt install libpng-dev

# seems installing libpng-dev will automatically getting zlib1g, so the following is not exactly needed
$ sudo apt install zlib1g-dev
After all of those were installed, for one last time, we tried to install Seurat and finally it was successfully installed. In total, it took us hours to get to this point.
Ubuntu + OSCA
Okay, what about OSCA then? With the previous experience, we actually could take some actions to make the troubleshooting a bit easier for us. To simulate the fresh start, we used a new VM instance with the same configuration. Then we installed R following the instructions on the official R website.
Once R installation was done, we could head to the OSCA installation page. We were told to use the following two commands to install OSCA.intro, which contains all packages needed for the tutorial:
install.packages("BiocManager")     # install bioconductor
BiocManager::install("OSCA.intro")  # install osca.intro
The installation of Bioconductor went smoothly without any problem. Then we were ready to install OSCA.intro using Bioconductor. Based on our previous experience, we knew that there would be an enormous amount of logs printed to the screen, and the errors would be buried into the text. Therefore, to make errors a bit easier to track, we first created a file called install.r. The content of the file is as simple as:
BiocManager::install("OSCA.intro")
Then we performed the installation using the following way from our terminal:
$ sudo Rscript install.r \
    1> osca_install_fresh.stdout \
    2> osca_install_fresh.stderr
Of course, it failed. Let’s find out the errors from thousands of lines from the stderr file. Since we already had some experience, we roughly knew what an error looked like. We could do this by:
$ grep -i 'error' osca_install_fresh.stderr
$ grep 'No such file or directory' osca_install_fresh.stderr
$ grep 'sh:' osca_install_fresh.stderr
When we looked for the keyword ’error’, we saw similar error messages like those in Seurat. They were in the following format:
ERROR: dependencies ‘<package_name>’ are not available for package ‘<package_name>’
* removing ‘/usr/local/lib/R/site-library/<package_name>’
In addition, there were also errors like:
Error in system(paste(MAKE, p1(paste("-f", shQuote(makefiles))), "compilers"),  :
  error in running command
The 2nd grep command returned nothing. I guess we had not reached that stage yet. The 3rd grep command gave us:
sh: 1: make: not found
We now know it is because make is not available in a freshly installed Ubuntu. Okay, let’s solve it by:
$ sudo apt install build-essential
After that, we ran install.r again and captured the output into new log files:
$ sudo Rscript install.r \
    1> osca_install_after_build_essential.stdout \
    2> osca_install_after_build_essential.stderr
First, let me show you the amount of text produced by this round of installation:
$ wc -l osca_install_after_build_esssential.std*
  11143 osca_install_after_build_esssential.stderr
   2176 osca_install_after_build_esssential.stdout
  13319 total
Anyway, we used the same set of grep commands to locate the problems. Many of them were redundant, so I just listed a few (not all) seemingly non-redundant output here:
# output from the 1st grep
configure: error: Cannot find cairo.h!
read.c:3:10: fatal error: png.h: No such file or directory
ERROR: configuration failed for package ‘curl’
configure: error: couldn't find zlib library.
ERROR: configuration failed for package ‘Rhdf5lib’
ERROR: configuration failed for package ‘XML’
ERROR: configuration failed for package ‘RCurl’
ERROR: compilation failed for package ‘irlba’
ERROR: configuration failed for package ‘xml2’
ERROR: configuration failed for package ‘openssl’
ERROR: compilation failed for package ‘Rhtslib’
ERROR: compilation failed for package ‘RcppEigen’

# output from the 2nd grep
read.c:3:10: fatal error: png.h: No such file or directory
/usr/bin/ld: cannot find -llapack: No such file or directory
/usr/bin/ld: cannot find -lblas: No such file or directory
/usr/bin/ld: cannot find -lgfortran: No such file or directory

# output from the 3rd grep
/bin/bash: line 1: libpng-config: command not found
sh: 1: gfortran: not found
/bin/bash: line 1: gfortran: command not found
Apparently, we saw some familiar faces, and some other stuff that we did not know, such as Rhtslib and RcppEigen which were not problems in Seurat (well … maybe they were but we did not catch them due to the length of the log). It was not a big deal since those errors were not independent. Some were caused by others. We could start with what we knew and solve them step by step. When we solved the problems we were familiar with, some other errors might be solved at the same time. Based on the previous experience, we did the following:
# to solve the cairo issue
$ sudo apt install libcairo2-dev

# to solve the png issue (automatically installed during libcairo2-dev installation)
$ sudo apt install libpng-dev

# to solve curl, Rcurl, openssl issues:
$ sudo apt install libcurl4-openssl-dev

# to solve the zlib issue (automatically installed during libpng-dev installation)
$ sudo apt install zlib1g-dev

# to solve the Rhdf5lib issue
$ sudo apt install libhdf5-dev

# to solve the XML and xml2 issues
$ sudo apt install libxml2-dev

# to solve the irlba and -lblas issues:
$ sudo apt install libblas-dev

# to solve the -llapack issue
$ sudo apt install liblapack-dev

# to solve the gfortran issue
$ sudo apt install gfortran
Okay, we next tried our luck after all those installations by running the script again:
sudo Rscript install.r \
    1> osca_install_after_build_esssential_cairo.stdout \
    2> osca_install_after_build_esssential_cairo.stderr
This time, we had even longer logs:
$ wc -l osca_install_after_build_esssential_cairo.std*
  13663 osca_install_after_build_esssential_cairo.stderr
   2347 osca_install_after_build_esssential_cairo.stdout
  16010 total
There were still errors, but the good and promising thing was that the errors were much fewer than before. Using the same set of grep commands, we had:
# the 1st grep command (all output)
hts.c:46:10: fatal error: lzma.h: No such file or directory
make[1]: *** [Makefile.Rhtslib:135: hts.o] Error 1
make: *** [Makevars.common:22: htslib] Error 2
ERROR: compilation failed for package ‘Rhtslib’
ERROR: configuration failed for package ‘textshaping’
ERROR: dependency ‘textshaping’ is not available for package ‘ragg’
ERROR: dependency ‘Rhtslib’ is not available for package ‘Rsamtools’
ERROR: dependency ‘ragg’ is not available for package ‘ggrastr’
ERROR: dependency ‘Rsamtools’ is not available for package ‘GenomicAlignments’
ERROR: dependencies ‘Rsamtools’, ‘GenomicAlignments’ are not available for package ‘rtracklayer’
ERROR: dependency ‘rtracklayer’ is not available for package ‘GenomicFeatures’
ERROR: dependency ‘ggrastr’ is not available for package ‘scater’
ERROR: dependencies ‘GenomicFeatures’, ‘rtracklayer’, ‘Rsamtools’ are not available for package ‘ensembldb’
ERROR: dependencies ‘ensembldb’, ‘GenomicFeatures’ are not available for package ‘scRNAseq’
ERROR: dependencies ‘rtracklayer’, ‘scater’, ‘scRNAseq’ are not available for package ‘OSCA.intro’

# the 2nd grep command (all ouput)
hts.c:46:10: fatal error: lzma.h: No such file or directory

# no output from the 3rd grep command
The lzma.h issue was related to the htslib which many things were built upon. If we solve this, there is a chance we might solve all the problems. We Googled the error message and we found out that we should do:
sudo apt install liblzma-dev
After that was done, we tried to install OSCA using the R script once again:
sudo Rscript install.r \
    1> osca_install_after_build_esssential_cairo_lzma.stdout \
    2> osca_install_after_build_esssential_cairo_lzma.stderr
Unfortunately, errors still existed, but they were manageable:
# 1st grep
ERROR: configuration failed for package ‘textshaping’
cram/cram_io.c:53:10: fatal error: bzlib.h: No such file or directory
make[1]: *** [Makefile.Rhtslib:135: cram/cram_io.o] Error 1
make: *** [Makevars.common:22: htslib] Error 2
ERROR: compilation failed for package ‘Rhtslib’
ERROR: dependency ‘textshaping’ is not available for package ‘ragg’
ERROR: dependency ‘Rhtslib’ is not available for package ‘Rsamtools’
ERROR: dependency ‘Rsamtools’ is not available for package ‘GenomicAlignments’
ERROR: dependency ‘ragg’ is not available for package ‘ggrastr’
ERROR: dependencies ‘Rsamtools’, ‘GenomicAlignments’ are not available for package ‘rtracklayer’
ERROR: dependency ‘ggrastr’ is not available for package ‘scater’
ERROR: dependency ‘rtracklayer’ is not available for package ‘GenomicFeatures’
ERROR: dependencies ‘GenomicFeatures’, ‘rtracklayer’, ‘Rsamtools’ are not available for package ‘ensembldb’
ERROR: dependencies ‘ensembldb’, ‘GenomicFeatures’ are not available for package ‘scRNAseq’
ERROR: dependencies ‘rtracklayer’, ‘scater’, ‘scRNAseq’ are not available for package ‘OSCA.intro’

# 2nd grep
cram/cram_io.c:53:10: fatal error: bzlib.h: No such file or directory
Not sure about others, but we Googled the bzlib.h issue and found out we needed to install the following library:
$ sudo apt install libbz2-dev
We next did the whole iteration again and we only got the following errors:
ERROR: configuration failed for package ‘textshaping’
ERROR: dependency ‘textshaping’ is not available for package ‘ragg’
ERROR: dependency ‘ragg’ is not available for package ‘ggrastr’
ERROR: dependency ‘ggrastr’ is not available for package ‘scater’
ERROR: dependency ‘scater’ is not available for package ‘OSCA.intro’
It seemed we had some issues about specific R packages, such as textshaping and ragg. We did some Googling and found out this thread and this thread, telling us to do the following:
# for textshaping
$ sudo apt install libharfbuzz-dev
$ sudo apt install libfribidi-dev

# for ragg
$ sudo apt install libtiff-dev
After that, we did one last round of iteration. Finally, we successfully installed OSCA and we should be able to start with the tutorial.
Seurat or OSCA On Other Distributions
Once we figured out how to install Seurat or OSCA on Ubuntu, we could use the exact same procedures to figure out how to install them on other popular distributions like Debian, Fedora or others. Here I summarised them altogether in the Summary section below.
Summary
If you use Scanpy, you are pretty much good to go. Just follow the Scanpy tutorial, and you will not have any problem.
If you use Seurat or OSCA, it depends on your operating system.
Seurat on Ubuntu 22.04
You need to make sure the following dependencies in Ubuntu are installed via apt before you install Seurat inside R:
# install R
sudo apt update
sudo apt upgrade
sudo apt install --no-install-recommends software-properties-common dirmngr
wget -qO- https://cloud.r-project.org/bin/linux/ubuntu/marutter_pubkey.asc | sudo tee -a /etc/apt/trusted.gpg.d/cran_ubuntu_key.asc
sudo add-apt-repository "deb https://cloud.r-project.org/bin/linux/ubuntu $(lsb_release -cs)-cran40/"
sudo apt install --no-install-recommends r-base

# install some useful programs
sudo apt install build-essential
sudo apt install gfortran

# install the following packages one by one
sudo apt install libcurl4-openssl-dev
sudo apt install libhdf5-dev
sudo apt install h5utils
sudo apt install libblas-dev
sudo apt install liblapack-dev
sudo apt install libpng-dev
OSCA on Ubuntu 22.04
You need to make sure the following dependencies in Ubuntu are installed via apt before you follow the tutorials:
# install R
sudo apt update
sudo apt upgrade
sudo apt install --no-install-recommends software-properties-common dirmngr
wget -qO- https://cloud.r-project.org/bin/linux/ubuntu/marutter_pubkey.asc | sudo tee -a /etc/apt/trusted.gpg.d/cran_ubuntu_key.asc
sudo add-apt-repository "deb https://cloud.r-project.org/bin/linux/ubuntu $(lsb_release -cs)-cran40/"
sudo apt install --no-install-recommends r-base

# install some useful programs
sudo apt install build-essential
sudo apt install gfortran

# install the following packages one by one
sudo apt install libcairo2-dev
sudo apt install libcurl4-openssl-dev
sudo apt install libhdf5-dev
sudo apt install libxml2-dev
sudo apt install libblas-dev
sudo apt install liblapack-dev
sudo apt install liblzma-dev
sudo apt install libbz2-dev
sudo apt install libharfbuzz-dev
sudo apt install libfribidi-dev
sudo apt install libtiff-dev
Seurat on Debian 12
You need to make sure the following dependencies in Debian are installed via apt before you install Seurat inside R:
# install R
sudo apt update
sudo apt upgrade
sudo apt install r-base

# install the following packages one by one
sudo apt install libcurl4-openssl-dev
sudo apt install libhdf5-dev
sudo apt install h5utils
OSCA on Debian 12
You need to make sure the following dependencies in Debian are installed via apt before you follow the tutorials:
# install R
sudo apt update
sudo apt upgrade
sudo apt install r-base

# install the following packages one by one
sudo apt install libcairo2-dev
sudo apt install libcurl4-openssl-dev
sudo apt install libhdf5-dev
sudo apt install libxml2-dev
sudo apt install libharfbuzz-dev
sudo apt install libfribidi-dev
sudo apt install libtiff-dev
Seurat on Fedora 38 38-20230413.1
You need to make sure the following dependencies in Fedora are installed via yum before you follow the tutorials:
# install R, answer yes to all prompts
sudo yum install R

# install the following packages one by one
sudo yum install libcurl-devel
sudo yum install openssl-devel
OSCA on Fedora 38 38-20230413.1
You need to make sure the following dependencies in Fedora are installed via yum before you follow the tutorials:
# install R, answer yes to all prompts
sudo yum install R

# install the following packages one by one
sudo yum install cairo-devel
sudo yum install libcurl-devel
sudo yum install openssl-devel
sudo yum install fribidi-devel
sudo yum install libtiff-devel
sudo yum install libjpeg-devel